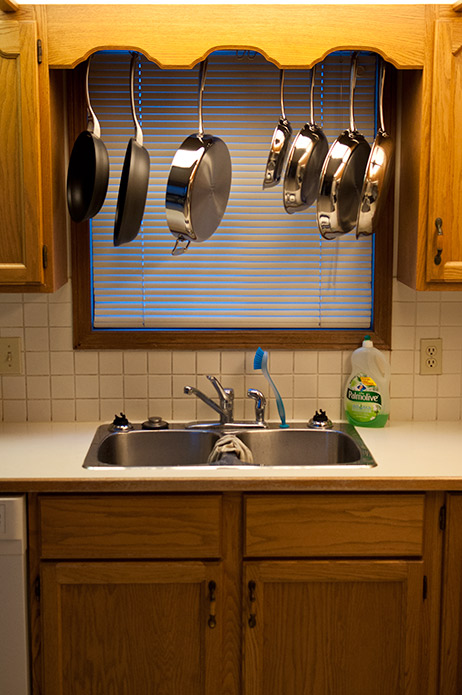
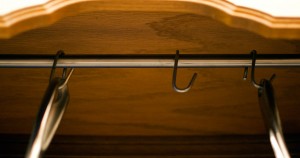
This isn’t really that difficult of a problem but I thought it was pretty slick and easy so I’m posting this up. My requirement was that the pots and pans rod must be up and out of sight as shown in the images above, and that the S-hooks must be twisted 90 degrees so that the pans face sideways, and therefore save space.
I got the original idea to use the GRUNDTAL rod from IKEA from IKEA Hackers website: http://www.ikeahackers.net/2011/01/grundtal-pot-rack.html but I didn’t want to hang from the ceiling.
STUFF TO BUY:
- IKEA GRUNDTAL rail, stainless steel. A black and white cross sectional drawing above shows what the ends are like, it’s a 16mm tube with two nuts inserted on each end. Choose the rail that is longer than the length you require. I got the 120cm rod on sale for $8. If you do like I do in this article you won’t need to use the screws or end flanges that come with the rod.
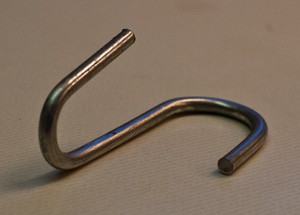
- S-hooks, I recommend GRUNDTAL S-hook, stainless steel, 7cm, $4 for packs of 5 in Canada (don’t get the 11cm hooks because the loops are too large and your pans will twirl and not stay parallel). The S-hooks pictured in my images above are from Princess Auto and were $2 for packs of 10, HOWEVER, because they are not designed for this rail and purpose I had to modify them with a bit of brute force to get them to work right, and they are round and not flat cross section, so the round S-hooks cause the pans to spin and clang against each other which can be annoying. The Princess Auto S-hooks work good enough though so I think I might keep them.
- Two metric 6mm (M6X1) bolts, approximately 25 or 30mm long (shorter or longer depending on thickness of wood in your cabinets). RONA has these and many other hardware stores but sometimes metric fasteners are tough to find depending on where you are.
- A few stainless steel washers 6mm, or 1/4″ will fit also. (optional)
TOOLS REQUIRED:
- Tape measure and marker and pencil
- Two big adjustable wrenches
- Hack saw
- A very long screw driver, or something long and stiff that you can use to punch out the press-fit nut on the cut-off end of the rod
- Hammer
- Something to screw the bolts in with
- A helper to hold up the other end of the rod while you screw
- Drill, and a 6mm wood drill bit
The procedure is pretty simple, you just cut the rod accurately to length with a tape measure, marker and hack saw. The end that you cut off has a press-fit nut, you must transfer this nut from the cut-off piece of tubing to the sawed off end of the long piece of tubing you will be keeping. To do this I used a long screw driver placed on the floor facing upright with the pointy end up in the air, I slipped the small piece of tube over top of the screw driver with the nut-side on top, then I popped out the nut by holding the outside of the tube and slamming the tube down onto the screw driver. Once you get the nut off, hammer it into the open end of the long tube you just sawed off until it’s flush and square to the end.
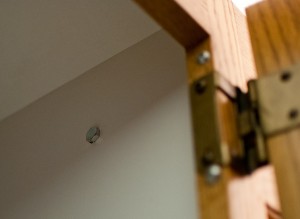
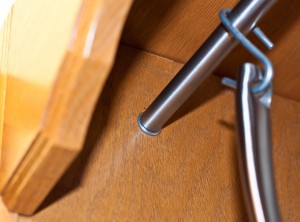
Mark off with pencil and tape measure exactly where you want your rod to go, and then drill the 6mm holes in the side cabinets so that the rod will be level and where you want your pans to hang… be careful not to put the rod too close to the window or the big pans might touch the window. Have somebody hold the rod while you bolt the rod into the holes. I haven’t shown in the images but for good measure I should have put washers on the inside of the cabinets before inserting the bolts. The washers that are shown in the images beside the rod are because I cut the rod a bit too short, and the 1/4″ washers fill up the gaps, you can stack washers if the gaps are large. The bolts you select should be long enough to pass through the cabinet and all the way through the press-fit nuts. Tighten the bolts but not to tight because you don’t want to damage the cabinets, just make them a little snug.
For the S-hooks, take the two large adjustable wrenches, and clamp one snugly on each end of the S, but spaced apart about an inch from one another. Now with both wrenches in your hand, carefully twist the S-hook so it forms a 90 degree twist in the middle. Test the first hook to make sure it will work and then do it for all the hooks.
The Princess Auto S-hooks, I had to make the one end of the hooks more rounded so it would fit over the rod, and the other end for the pan handles I had to make them span out farther to get the pans to smoothly go on and off without getting hung-up on the hooks.
The IKEA S-hooks do not have a round cross section, the flat cross section of the IKEA hooks will make your pots and pans more stable so that they do not clang loudly against one another. I recommend you try this using the IKEA S-hooks designed for this rod, rather than the circular cross section hooks commonly available in hardware stores because of the higher pan stability.

